To remove the top speed limiter, and increase the red line limiter to 7000 rpm instead of 6500.
Ingredients:
- A 2001 Dodge stratus RT (same car as a 2001 Mitsubishi eclipse GT except the body) Mine is below;
- Tactrix OpenPort 2.0 cable to download the ROM image from the stock ECU and to reflash the ECU with the modified ROM image. Mine is shown below;
- EcuFlash Software
- Read this thread in Club3g first (Thanks to LogicGate and Club3g)
- A hex editor software. I used HxD hex editor.
- Notepad++
 Now first, you need to do some search to see if your ECU can be reflashed using the Tactrix cable. In 2001 model Dodge Stratus RT, Mitsubishi decided to put in a so called H8 Hitachi Based ECUs. However in Eclipse GTs they used the SH7 Hitachi Based ECUs. If you read the thread in Club3g above, you can download the ROM but cannot reflash an H8 ECU with a tactrix 1.3 whereas you can both download and flash SH7. That is why you need to buy a Tactrix 2.0 if you want to flash the ECU with the modified ROM.
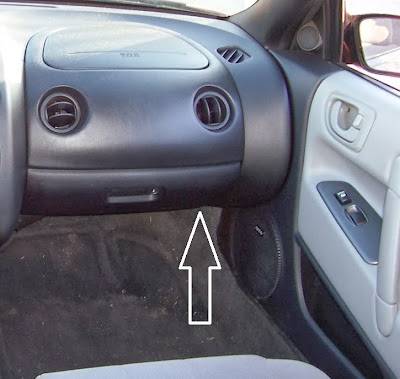
So, to make sure what ECU i had i took out the ECU which is under the glow bow (left).
Another picture from beneath the glow box;
When you open the box of the ECU you get the following:
SIDE A
SIDE B
The main CPU is in the middle in the white circle above, and the number on it is;
Yeap, it is an H8 because it says "MH8305F" on it.
When you download the latest version of EcuFlash (Version 1.44.3721) you will have a folder named rommetadata in the installation folder which includes around 600 definition files or ROM metadata models as EcuFlash calls it in the Task Info Screen;
Now what you need to have in order read the ROM in your car's ECU is a definition file that would guide EcuFlash to the memory locations in the ROM image so that you will now what values you are changing in EcuFlash.
Of course, you need to download the stock ROM image in your ECU using the tactrix cable. It is pretty straight forward, so i am not gonna waste time here and assume you already downloaded it to your laptop.
If you are lucky you will find a definition file in all those 600 something definitions files in the rommetadata folder. If not, EcuFlash will warn you and give you choices of starting a definition file from scratch or inherit or copy from a definition file which is in the metadata. However if EcuFlash finds a match it will load the stock ROM and show you the tables on left pane of the program. You can find stock ROMs and definition files for different cars online, so let me give you an example;
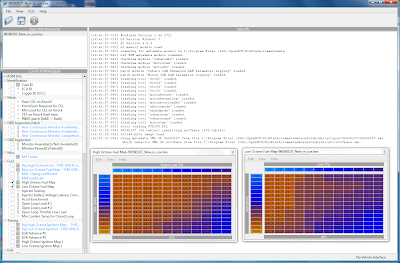
This is a modified ROM file with ID 96590107 (2005 Mitsubishi Eclipse GT manual transmission)written on the top of the window. The stock ROM you download will have its own unique ID as the file name. If not, you can find the name on position f52 line 4 of the ROM file in H8 ECUs, which you can read using the hex editor, but we will get back to that later. For now on the left pane of the picture above, you can see two tables "High Octane Fuel Map" and "Low Octane Fuel Map" is ticked. When you select them a window for each table pops up as you see. You can change individual values in this color mapped table or write your own script to generate a richer fuel map. I personally did not touch any of these, because it is a delicate process that requires experience and knowledge of EFI mappings.
The problem you may face if you are not lucky is to use definition file for another similar car and having some of the tables in EcuFlash but they might be messed up, which happened to me as you can see in the below picture;
In the above picture i have the high octane fuel map from my stock ROM read with same definition files as stated in the Task Info of EcuFlash as;
"using metadata XML ID 85110030 from file C:/Program Files (x86)/OpenECU/EcuFlash/rommetadata/mitsubishi/eclipse/85110030.xml
which inherits XML ID 96720008 from file C:/Program Files (x86)/OpenECU/EcuFlash/rommetadata/mitsubishi/eclipse/96720008 2001 USDM Eclipse GT MT.xml
which inherits XML ID evo7base from file C:/Program Files (x86)/OpenECU/EcuFlash/rommetadata/mitsubishi/evo/evo7base.xml"
So, tables were inherited from two definition files; evo7base and 96720008 2001 USDM Eclipse GT MT.
USDM Eclipse GT Manual Transmission is actually the exact same car as mine with a different body, so EcuFlash was on the right track but if you look at the tables above, the correct high octane fuel map should be as in the lower table but mine (upper table) had problems in the axis values. And you can see the mapping is a little bit different in these cars as well.
To summarize what is what;
A definition file will include the positions of the bits required for generating the tables and other values shown in above tables and etc. which are recorded in the ROM image. A ROM image is a Hex file which can be edited by a Hex editor. So if you have the definition and the stock ROM of another car similar to yours (like in my case) you can find the locations of the bits dedicated to the axis values for a table and search for a similar pattern in your car's stock ROM image and put the position values in the rather imperfect definition file you use to read your ROM.
Ok, so if you want to have the correct tables you need to change the bit locations in the definition (or ROM metadata model) file. In order to do this, you need to open the definition file used for your car by EcuFlash (in my case it was the 96720008 2001 USDM Eclipse GT MT.xml not the evo7base.xml) in notepad++. Also you need to open the definition file of the similar car (2005 Eclipse I talked about before) in Notepad++ as well. So that you can compare each definition file and find the correct position of the table axis for High octane fuel map, and find the bits in the ROM of the vehicle with the correct definition file, copy initial few of the bits and search for these bits in your cars ROM and type in the correct addresses in the definition file you are using for your car.
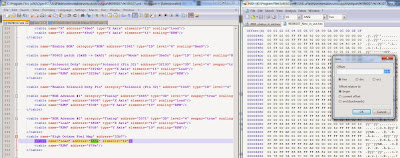
As you can see above, on line 351 of the definition of the similar car, i have the address of the bits (length of the numbers, 12 numbers in the axis for the table if you check the previous table above for Engine Load) for axis values, which is: "663a". Now you can use the go to function of the hex editor to go to that bit as seen on the right. Now copy some bits as shown below;
and paste them in the search box for your stock ROM, as shown below;
If you find more than one of the same sequence in the ROMS (you may have the same axis values written in the ROM for another table, like the High octane ignition table for example...) you should write down with what distances it occurs in the ROM of the similar car with the correct definition and use the one in your ROM appearing in the same position with respect other occurrences. But if you choose a long number of bits the occurrence should be 1.
When you find the sequence in your ROM you should locate the position of the first bit, by clicking the first "00" bit on the highlighted sequence in your ROM and the position will be written on the bottom left hand side as shown below;
Now you can change the incorrect address in your definition file to "564E", as shown below, and save it and reload the ROM for your car again in EcuFlash and see the table for the High Octane Map, voila...
Now you can generate your own definition file for your car, it would take sometime but when done, you should be able to change whatever is listed below :)
However do not change any of the mappings if you do not know what you are doing, i only changed the Rev Limit parameter from 6501 to 7000 and Speed limit from 210 to 270, which meant disabling for my car, it would never hit 270 km/h as it is :)... I bought the cable for $190 and sold it in 2 weeks for $140 and basically increased the rev limit and disabled the speed limit for $50. Please comment below if you liked it...


